 One of my favorite events of the year is being held this weekend in the Bay Area. Maker Faire, now in its 6th year, is an exposition of hands-on workshops, do-it-yourself projects, and demonstrations that bring together art, technology, and lots of creativity. I remember when I visited for the first time 5 years ago, being wowed by the Eepy Birds Diet Coke & Mentos geysers and a life-size version of the “Mouse Trap” game (the marble and tiny plastic bathtub in the board game became a bowling ball and an actual bathtub!).
Each time I’ve attended, I’ve been amazed by the creativity and ingenuity evident in the hundreds of projects that fill the exhibit halls. How does one bring the innovation, critical thinking, and problem solving that make Maker Faire so inspiring back to the science classroom?
 First, the sponsors of Maker Faire publish “Make,” a quarterly magazine that celebrates inventive do-it-yourself projects. While some of the projects are a bit complex for my middle school students, many of the clearly explained projects in Make use everyday objects and are appropriate for an inspired 13-year-old student. When I taught a “Design Challenge” elective, having this magazine on my classroom bookshelf both gave me projects to complete with my students (i.e., engineer your own alarm or doorbell system for your bedroom) and served as a resource for students to turn to for inspiration for their own projects.
Secondly, Maker Faire is expanding – adding more cities and a “Maker Education Day” to their schedule. The event is next headed to North Carolina, Vancouver, and Detroit, with New York City to follow in the fall. Instead of bringing Maker Faire back to your classroom, bring your classroom to the event!
Finally, the San Jose Museum of Technology and Innovation has developed a “Design in Mind” curriculum that is sure to inspire creativity and critical thinking in your students. Their program includes both an engineering competition at the museum and a set of lesson plans that a teacher can implement in his or her classroom. The lessons present students with real world problems along with a process for acquiring knowledge, brainstorming solutions, and then testing (and retesting) their ideas. From designing earthquake-proof structures to engineering a tool to help a friend reach the top shelf of a cabinet from her wheel chair, I’ve found my students both inspired and engaged by the “Design in Mind” lessons.
I’ll be taking my camera along to Maker Faire this Saturday and will share some of my discoveries in the coming week!

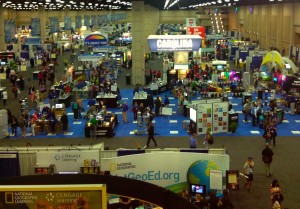 The National Science Teachers Association annual convention is a 4-day exhibition of the latest and greatest in science teaching. From workshops and presentations (the details of which fill a phonebook-sized guide!) to an exhibit hall packed with vendors and exhibitors, I always find the convention to be a wealth of information and ideas. In this series of posts, I’ll be sharing my favorite takeaways from the 2013 event.
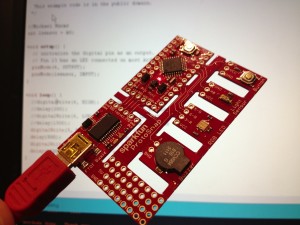
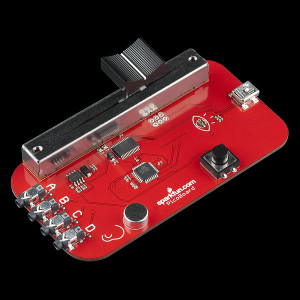 While incredibly easy to pick up, the Arduino programming language may challenging for younger students – I’d readily teach it to my 6th grade students but I am concerned that the syntax might not be accessible to the 3rd and 4th grade students I’ll be teaching in a maker camp this summer. Enter the
 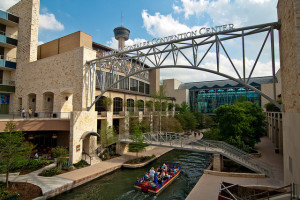 I’ve just wrapped up my second day at the National Science Teachers Convention in San Antonio, TX. The buzz of the conference has been the Next Generation Science Standards (NGSS), which were just released this week. Developed by scientific education organizations in partnership with 26 states, the standards seed to define 21st century science education. The NGSS establish learning expectations for students that integrate three important foci—science and engineering practices, disciplinary core ideas, and crosscutting concepts—outlining science and engineering concepts from kindergarten through 12th grade. The new standards are available at
  Over twenty years later, the Rube Goldberg project has become an integral part of my teaching, serving as a culminating assessment for my 8th grade physics unit. Students apply their understanding of Newtonian physics to create 8 or more step machines that include 5 or more different simple machines. After presenting their finished machines to their families and younger students, my 8th graders engage in a detailed written analysis of their machines and a reflection on the engineering process. I find this project to be particularly powerful for how it pushes students to not only apply content knowledge but also to think critically, problem solve, and work collaboratively.